How to Check Image Dimensions After Conversion
On this page
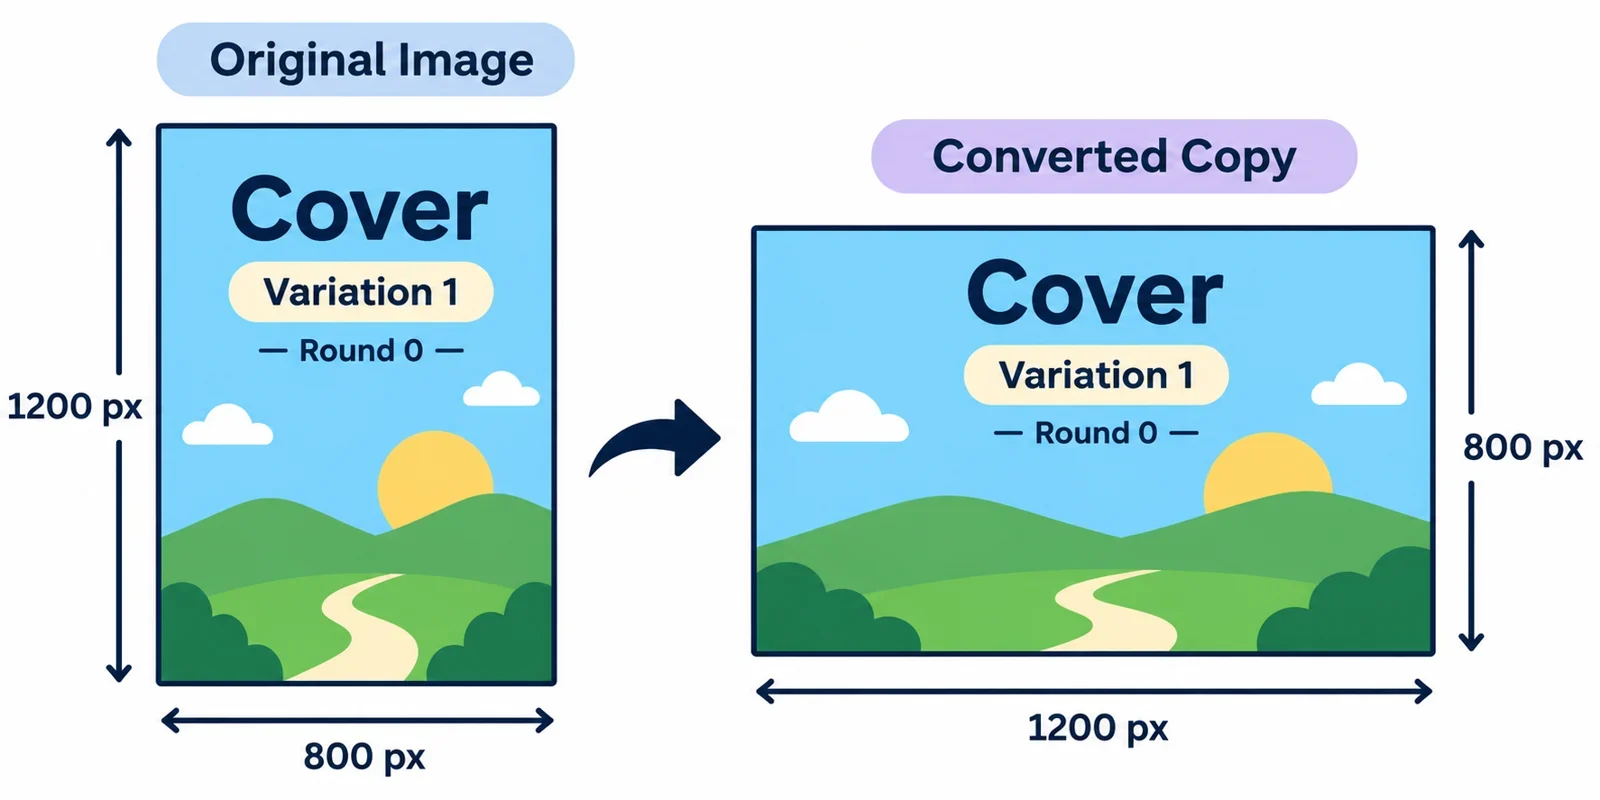
To find out whether conversion changed an image’s dimensions, record the original file’s width and height in pixels, then find the same two values for the saved converted copy. Compare width with width and height with height. If both match, the files have matching pixel dimensions; if either differs, investigate before using the copy.
You can make this check with an image viewer or a file information screen that displays pixel measurements. The exact menus depend on your device and software, so the steps below focus on what to look for and how to interpret the result.
Record the original image dimensions
Start with the file you intend to convert. Open it in an image viewer, or select it in your device’s file browser and look for an information, properties, or details view. Find the measurements labeled width and height, and check that they are given in pixels. If the screen does not show both values, try another viewer or information screen that does.
Write the measurements down in a consistent order: width × height, followed by “pixels.” For example, a PNG image measuring 640 pixels wide and 480 pixels high can be recorded as 640 × 480 pixels. Keeping the labels alongside the numbers is helpful when an information screen presents the values on separate lines.
Also note enough about the original to identify it again, such as its file name, format, and the folder where you found it. If you have several similar images, open the file and check its contents before recording the numbers. A measurement from a different image will make the later comparison misleading.
Find the right measurements
Some information screens show several kinds of information about a file. For this task, look specifically for pixel width and pixel height. If you see a value but cannot tell which measurement or unit it represents, open a different details view or consult the help for your viewer. Record both dimensions before moving on; a single number does not tell you whether the other dimension changed.
Keep your note accessible while you convert the image. A short record such as “original: 640 × 480 pixels” gives you a clear reference to compare with the saved copy.
Convert and save a copy
Select the original image in your chosen image conversion workflow, then choose the output format you need. Complete the conversion and save or download the resulting file. Keep the original available so you can inspect both files separately; use a distinct name or location for the copy if that helps you tell them apart.
Before you proceed, check that the selected image is the one whose dimensions you recorded. This matters especially when several files have similar names or show similar subjects. If a preview is available, use it as an additional check, but keep the file name and location in your notes as well.
Once the converted file is saved, locate it on your device. Make a note of its name, format, and location next to the original’s details. If the save or download process gives you a choice of name, a label such as “converted” can make the pair easier to recognize. You can use any naming method that lets you distinguish the two files confidently.
Keep the comparison straightforward
Do not rely on the output format or the appearance of a preview to establish the copy’s dimensions. The next step is to inspect the saved file itself and read its pixel width and height. If you make more than one converted copy, record which copy you intend to use and check that particular file.
If your workflow offers any settings that might alter the image, review the choices you made and keep a note of any relevant selection. Available settings vary, so use the controls and help provided by the conversion tool you are using. You do not need to assume that a resizing option is present in order to compare the finished files.
Compare width and height
Open the saved converted copy in a viewer or file information screen that displays pixel dimensions. Record its width and height in the same order and units you used for the original. Then place the two records side by side and compare each measurement separately.
For an original recorded as 640 × 480 pixels, a converted copy reported as 640 × 480 pixels has matching width and height. A copy reported as 640 × 400 pixels differs in height, while one reported as 600 × 480 pixels differs in width. A result of 600 × 400 pixels differs in both measurements. These are examples of how to read the comparison; your own values will depend on the files you inspect.
| Original and copy | What the comparison tells you |
|---|---|
| Width matches and height matches | The pixel dimensions match. |
| Width differs, height matches | The width has changed in the reported measurements. |
| Width matches, height differs | The height has changed in the reported measurements. |
| Both values differ | Both reported dimensions need attention. |
If the values appear in the opposite order—for example, 640 × 480 for one file and 480 × 640 for the other—write down exactly what each screen reports. Orientation may be relevant, so check it before deciding what the difference means.
Check against your intended use
Matching dimensions answer the question of whether the two reported pixel measurements match. They do not, by themselves, establish that the converted file meets every requirement for your intended use. If you have been given a required width and height, compare the copy with those values too. If the requirement is unclear, ask the person or service receiving the image which pixel dimensions are needed.
If both values match and the copy meets your stated dimension requirement, you can retain your notes and proceed with any other checks your use requires. If either value differs, investigate the mismatch before relying on the copy.
Investigate a mismatch
A mismatch is a reason to pause and check the comparison, not an automatic explanation of what happened. Start by confirming the identity of both files. Reopen the original from the location you recorded, then open the specific converted copy you plan to use. Check their names, formats, locations, and visible contents against your notes.
Read the width and height again for each file, making sure both sets of measurements are in pixels and that you have not reversed their order when writing them down. If you used different information screens, check their labels carefully. Correct any recording error and repeat the comparison using the saved files.
Consider orientation and conversion choices
If the same two numbers appear in reverse order, check how each file is displayed and whether orientation could explain the reported values. Consult the viewer’s help if you need to understand how it reports the dimensions of the files you are viewing. Record what you find, then decide whether the copy’s reported width and height meet the requirement for its intended use.
If the values differ in another way, review any choices made during conversion that could have changed the image’s size. Look for relevant settings only if your workflow provides them, and consult its instructions when a setting is unclear. If you used another editing step between opening the original and saving the copy, review that step as well. These checks can help you identify what to investigate; they do not establish the cause on their own.
If you need a copy with particular pixel dimensions, compare the saved result with those requirements before submitting or using it. You may need to repeat the conversion with suitable settings or use an appropriate image-editing tool, then save and measure the new result. Keep the original available and identify the new copy clearly so that you do not accidentally check an earlier version.
Finish by writing down the final copy’s width and height alongside the requirement it must meet. If the numbers still do not match and you cannot determine why, consult the relevant software’s help or ask the recipient what dimensions are acceptable before proceeding.