How to Choose Photos for an Auto-Parts Contact Sheet
Contents
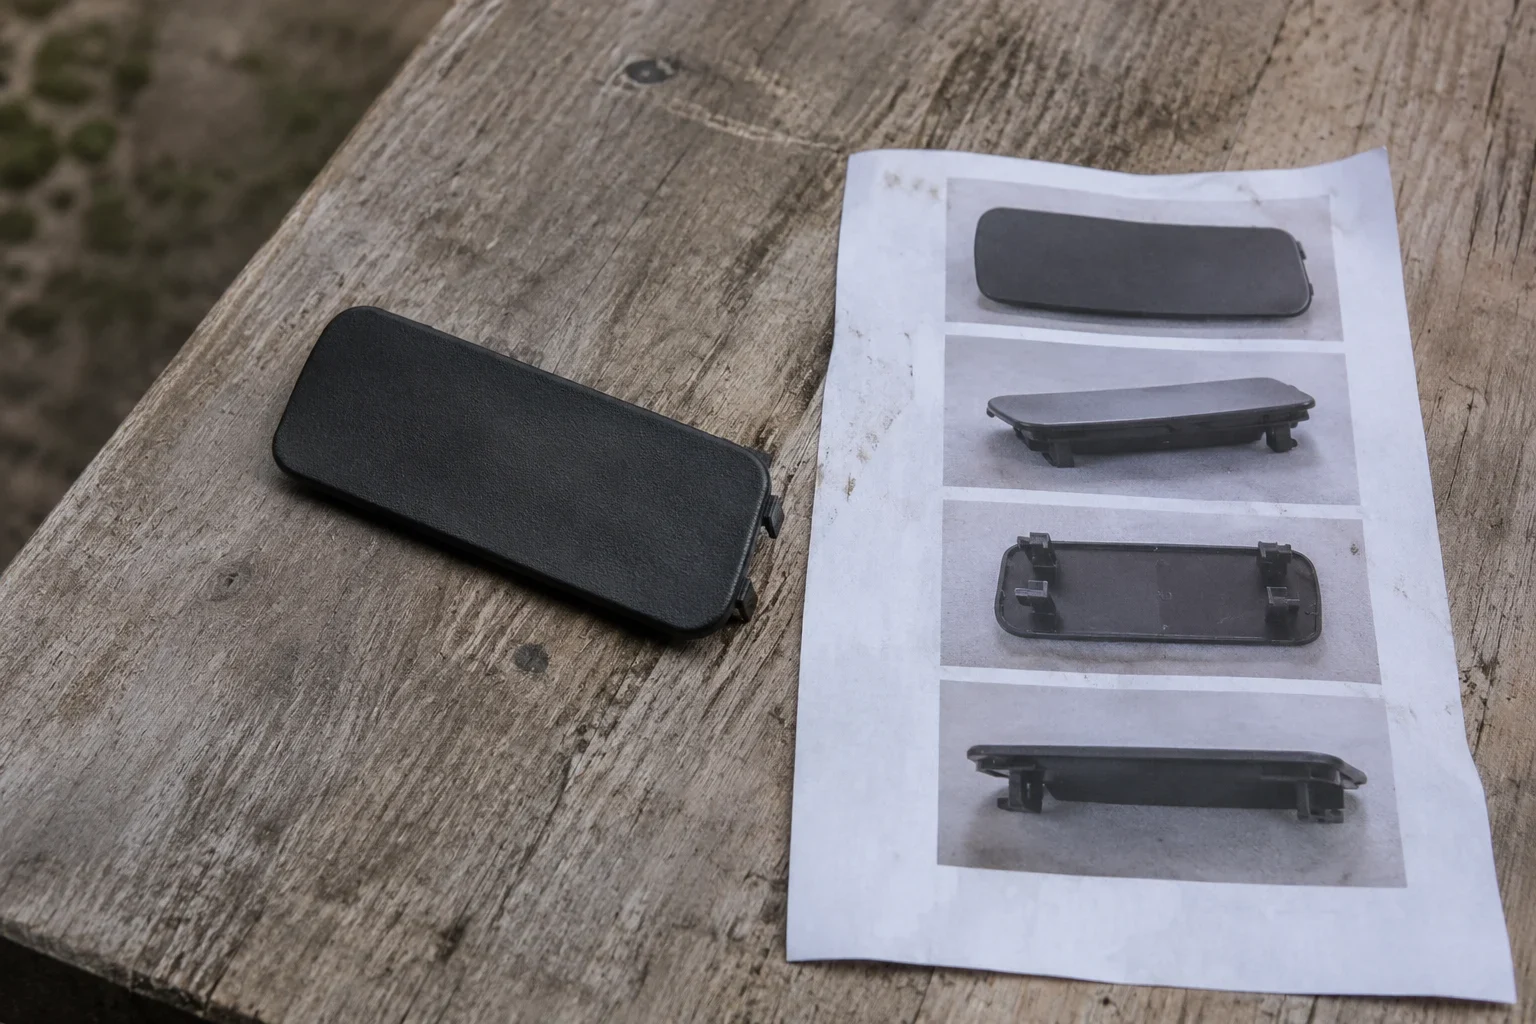
Choose auto-parts photos by starting with one clear view of the whole part, then adding only the views that help the intended viewer identify it or compare an important detail. Check that marks and connection points are visible, remove weak duplicates, and review the finished sheet at the size at which it will be used.
A contact sheet brings photographs together for review. Its value depends on what each selected image contributes: a small collection of complementary views can be easier to assess than a larger collection of nearly identical shots. The steps below will help you decide what to include, how to arrange it and how to make the original photos easy to find when a thumbnail is too small.
Start with the purpose of the sheet
Before selecting images, decide what you want the viewer to do. A sheet intended to help someone recognize one part calls for a clear overall view and supporting details. A sheet for comparing several parts also needs a way to keep each part’s photos together and make corresponding views easy to find.
Write a short question to guide your choices, such as “Which part matches the one I need to review?” or “Can the viewer read the mark and see the connection points?” Use the question to judge whether each photo deserves space. If a shot does not help answer it, set that image aside for now.
Group photos before making a selection
Separate photos by the part they show, using labels that you can recognize later. If the identity of a part is uncertain, give the group a neutral label and keep the uncertainty visible in your notes. Do not assign an identity simply because two parts look similar.
Within each group, sort the images into broad views and detail views. You do not need a fixed number of images for every part: choose enough to make the relevant features visible. For a comparison, consider selecting a similar type of overall view for each part, followed by any detail that matters to the decision.
Before you move on, ask whether someone unfamiliar with the set could tell where one group ends and another begins. A clear group label or a consistent order can make that easier, depending on how you plan to assemble and share the sheet.
Cover the whole part and its distinguishing details
Choose the strongest overall photo first. Look for an image in which the part is in focus, its outline is easy to follow and as much of it as possible is visible. A plain or uncluttered background can help the viewer distinguish the part from its surroundings. If the only available overall view hides an important area, add another view that reveals it.
Next, look for details that serve the sheet’s purpose. These may include an identifying mark, a connection point or another feature the viewer needs to inspect. Select a close view when the feature is difficult to see in the overall image, and check the original at a larger size to see whether the detail is actually readable or distinct.
Make each detail view useful
A close-up should show both the relevant detail and enough surrounding area for the viewer to understand where it belongs. If a tightly cropped image loses that context, pair it with a wider view or choose a less tightly framed alternative. For a mark, check every character that matters rather than assuming it can be reconstructed from a blurred image.
Connection-point photos deserve the same scrutiny. Choose an angle that reveals the area the viewer needs to compare, and add a second angle only if it exposes something the first one hides. If a necessary feature is obscured or out of focus in every available shot, note what needs another photo instead of treating the existing image as conclusive.
For a set of similar parts, use comparable views where available. Then add part-specific details when they help explain a meaningful difference.
Remove weak or repetitive images
Once you have a candidate set, compare similar photos side by side. Keep the one that best shows the information the viewer needs. Focus, visibility and framing matter more than keeping every exposure or angle. An image that looks acceptable on its own may contribute very little when a clearer version is already in the group.
Use these questions to make the comparison:
- Is the relevant area sharp enough to inspect?
- Is the part or detail obstructed, cut off or difficult to distinguish from the background?
- Does the image reveal a feature that the other candidate hides?
- Will that difference matter to the person reviewing the sheet?
If two images answer the same question equally well, select the clearer one. Keep both when they make a meaningful difference, such as showing opposite sides or revealing separate areas that cannot be seen in one view. A small change of angle alone is not a reason to include another image; check what the change actually reveals.
Handle imperfect photos deliberately
Do not discard a weak photo automatically if it is the only view of an important detail. Instead, mark that detail for closer inspection or a replacement photo. A blurry image of an identifying mark should not be treated as proof of what the mark says.
After removing duplicates, review the remaining group as a set. Confirm that you still have an overall view and the details needed for the intended decision. If removing one image leaves a gap, restore a useful alternative or identify the additional view you need.
Arrange and review the selected set
Put the images in an order that lets the viewer move from context to detail. For one part, start with the overall view, then place the identifying mark, connection points and other relevant details nearby. For multiple parts, group each part’s images together or arrange corresponding views consistently so the viewer can compare them without guessing.
Choose the number of columns and the thumbnail size with the intended viewing conditions in mind. More thumbnails on a sheet can make the collection compact, but small details may be difficult to inspect. Larger thumbnails give individual images more room, while potentially requiring more space for the full set. The useful balance depends on the selected photos and how the sheet will be viewed.
If you use a contact-sheet tool, check its available options and output before deciding on a layout. Provide the selected images in the order you want, where the tool allows it, and verify the result rather than assuming the output will preserve your preferred sequence or labels.
Inspect the result at its intended size
Open the generated sheet as the recipient is likely to see it. Can you recognize each part? Can you follow the groups and identify which detail belongs to which overall view? Check whether the marks and connection points needed for the decision remain visible at thumbnail size.
If a detail is too small, try a larger thumbnail, a different crop or a separate detail image, where those options are available. Review the revised output again. When the sheet cannot show a detail clearly, direct the viewer to the corresponding original rather than relying on the thumbnail.
Keep the sheet connected to its originals
A contact sheet is a useful overview, but a reviewer may need the original image to inspect a small mark or an obscured area. Before sharing the sheet, establish a consistent way to match each thumbnail to its source photo. The method can be as simple as a short identifier recorded in a separate list, provided the recipient can use it to find the right image.
For example, you might assign a part group the label “A” and number its selected photos A1, A2 and A3. Record which original belongs to each label, along with a brief description such as “overall view” or “mark close-up.” Use a different group label for another part. These labels organize the review; they do not establish the part’s identity.
If the sheet-making method supports labels, check that they are visible and match your list. If it does not, provide the mapping alongside the sheet in a form the recipient can follow. Avoid relying solely on memory or an order that could change when files are moved or the sheet is regenerated.
Make a final retrieval check
Pick a thumbnail, follow its label or position to the original, and open that image. Repeat with a detail photo and, for a comparison sheet, an image from another group. Confirm that the files you intend to share are the same ones recorded in the mapping and that the recipient will have a way to access them.
Finish by checking the whole set against your opening question. If the viewer can recognize the part, find the relevant details and retrieve an original when needed, the selection is ready for review.