How to Arrange Before-and-After Repair Photos in a Contact Sheet
On this page
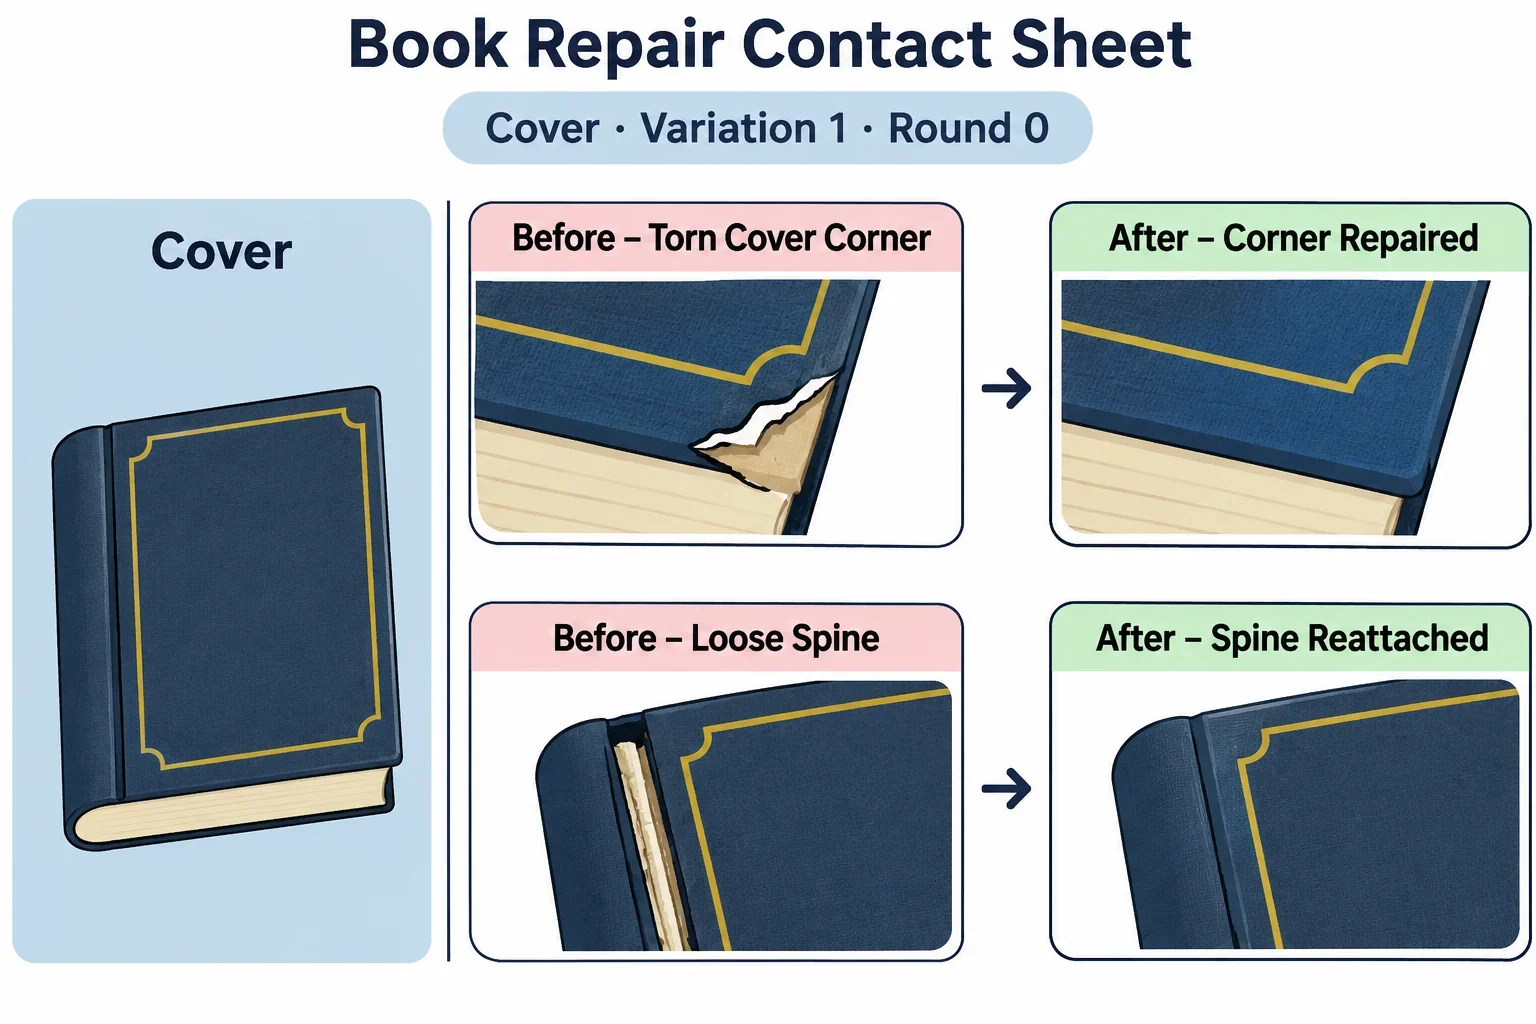
To make a useful before-and-after repair contact sheet, start by matching photos of the same area from comparable viewpoints. Put each before image immediately before its after image, identify both the area and stage, and check the finished sheet to make sure the pairs are easy to read.
A contact sheet brings several photographs together for review, usually with identifying information. For a repair comparison, the goal is to let someone find the same area in both stages without guessing which images belong together. The workflow below covers selecting and ordering photos, choosing a grid and checking the downloaded result. The available controls may vary, so check what your chosen contact sheet tool supports as you work.
Choose matching repair views
Begin by gathering the photos you might use and sorting them by the area they show. Give each area a short working name, such as “front panel” or “left corner.” These are examples; use descriptions that make sense for your repair and distinguish one area from another.
Within each group, look for a before photo and an after photo that show the same part from a comparable angle. Check the surrounding features as well as the repair itself: they can help a reader recognize that the two images belong together. A close-up of a small spot may be useful, but it can be difficult to compare with a wide shot of the whole area. If both close and wide views matter, consider making a separate pair for each.
Review each potential pair
Look at the images side by side before adding them to a sheet. Ask yourself:
- Can I identify the same repair area in both photos?
- Is the viewpoint similar enough to make the change understandable?
- Is the relevant detail visible in both images?
- Do I know which image shows the before stage and which shows the after stage?
If you have several candidates, choose the pair that answers those questions most clearly. A photo that looks attractive on its own is less helpful if its counterpart shows a different part of the repair. Keep additional images available in case you need to replace a selection after reviewing the sheet.
A missing or unclear counterpart deserves attention before layout. If you can take another photo, try to frame the same area in a way that makes comparison easier. Otherwise, use the best available image and describe the limitation in a note or key. If you cannot confidently identify an image’s stage, leave it out of the comparison until you can verify it; a plausible guess can mislead the reader.
Prepare an order and labels
Once you have chosen the pairs, make a simple list in the order you want them to appear: the first view’s before image, its after image, then the next view’s before and after images. Repeat that pattern throughout. Keeping the stages in the same sequence gives the reader one rule to follow across the sheet.
Plan a label for every image, combining the area or view with the stage. For example, a two-view list could look like this:
| Position | Example label |
|---|---|
| 1 | Front panel — Before |
| 2 | Front panel — After |
| 3 | Left corner — Before |
| 4 | Left corner — After |
Add a view description when the area name alone is ambiguous, such as “Front panel, close view — Before.” Keep labels concise enough to fit the space you expect to have, while retaining the words that distinguish one image from another. Avoid relying on “before” and “after” alone when several pairs show different areas.
Decide where the identification will appear
Check whether your chosen contact sheet tool can display a label for each image and whether its label space is adequate. If it can, prepare the text you want to use. If it cannot, or if the labels would be too small to read, prepare a separate key in the same sequence as the sheet. The key can list each position and its full label, as in the example above.
A separate key only works if the reader can tell which position it describes. Before sharing it, make sure the sheet’s reading order is clear and that the key accounts for every image. If the layout or tool makes that difficult, consider adding labels in another editor that supports them, then check the result for legibility.
Keep the original photos and your order list available while you build the sheet. They give you a reference for checking whether a photo was omitted or placed in the wrong pair, and they make it easier to rebuild the layout if you need larger images.
Build the contact sheet
Open your chosen contact sheet tool and select the prepared photos. Use your order list as a guide, and check how the tool handles image selection and ordering. If it provides a way to rearrange images, put them in the planned before-then-after sequence. If the order cannot be adjusted there, check whether you can prepare the selection differently or use another tool that lets you produce the intended sequence.
Next, consider the grid. If the tool lets you choose the number of columns, an even number can make it easier to keep each two-image pair together across a row. For example, a four-column row can show two pairs: before, after, before, after. With an odd number of columns, a pair may fall across the end of one row and the start of the next. That can still work, but the reading order and labels need to make the relationship clear.
Balance the grid and image size
Choose thumbnail dimensions, or the closest available layout setting, with the repair detail in mind. A grid that accommodates every photo at once may make the images too small to compare. If the tool offers a preview, use it to see whether the important area is visible and whether labels remain readable. A preview is a useful first check; the downloaded result still needs its own review.
If the images look cramped, consider using fewer images per sheet, choosing a layout with larger thumbnails if available, or making separate sheets for different groups of views. Keep each before-and-after pair together wherever practical. A wider view and a close view can be presented as distinct, labeled pairs so the reader knows what each comparison is intended to show.
Also check how each image fits in its allotted space. If a tool offers fit or crop choices, select the option that keeps the relevant repair area visible and gives the reader enough context to recognize it. If there is no suitable control, you may need to prepare a different image or try another layout. Before downloading, compare the displayed selection with your list and look for missing images, duplicates and pairs that have become separated.
Check and save the result
Download the sheet using the available option, then open the downloaded result. Review it as a reader would, without relying on your memory of the photos. Start at the first image and follow the intended reading order through to the end, including every point where a row changes.
For each pair, check that the before and after images show the same area and that their labels identify the stages correctly. Compare the sheet with your order list: every selected image should appear once in its intended position. Look for a missing after image, a repeated before image or a pair that now straddles rows in a confusing way. If you prepared a separate key, check every entry against its image and make sure the key travels with the sheet when you share it.
Look closely at the details
View the result at a size appropriate for how you plan to use it. Can you read the labels, recognize each area and see the change that the pair is meant to show? Check the edges of each image as well as its center, especially if the repair or a useful identifying feature is near the boundary. An image may be present but still be difficult to use if the relevant detail is too small or does not fit in the visible area.
When something is unclear, return to the selection or layout and make a targeted adjustment. Replace a weak counterpart, shorten an ambiguous label, enlarge the thumbnails if the tool allows it, or split a crowded sheet into smaller groups. Then download and open the revised result and repeat the checks affected by the change. In particular, confirm that a new layout has not changed the image order or separated a pair unexpectedly.
Save the checked result with a name that helps you distinguish it from earlier versions, and retain the accompanying key if you used one. Before sending the sheet to someone else, make one final pass over both items: the images should tell a consistent before-and-after story, and the identification should give the reader enough information to follow it.